
Why WordPress?
![]()
Today’s blogging resources are endless. There are hundreds of platforms to build a blog on and it’s hard to know which is the best when you’re first starting out. Over the last 7 years, I’ve started many a blog and tested out many different blogging and website platforms (including Blogger, Squarespace, Wix and WordPress.com). And without a doubt, WordPress.org has been the best and most sustainable blogging platform I’ve used.
Just to clarify, WordPress.com and WordPress.org are two different blogging platforms. It can be confusing, I know, but in this post I am referring to WordPress.org. WordPress.org is a self-hosted blogging and website platform, meaning they do not have an in-house server that hosts your blog (like Wix or Squarespace). It is a free platform, but you will need to purchase a separate hosting plan through a website hosting company.
That’s where Siteground comes into play.
Just like blogging platforms, hosting platforms come in every shape and size. Before building my website and starting my business, I did some extensive research on hosting platforms. In my research (and now 4 years of personal experience) I’ve found Siteground to offer the most value for the lowest cost. They have exceptional support and customer service and are an incredibly strong hosting service.
In this post, I’ll be walking you through the exact steps it takes to make a WordPress blog with Siteground.
So let’s get our blog on, shall we?!
[one_half padding=”0 20px 0 x”]

[/one_half]
[one_half_last padding=”0 0 0 20x”]
Step 1//
Decide on your blog name
![]()
This is the most important step and (obviously) must be done before you can physically make a WordPress blog. If you already have a name in mind, great! Go ahead and move on to step 2. If you don’t have a name in mind, here are a few quick questions you can use to help you brainstorm.
What will your blog be about? Do you want to include your name in your blog’s title? Do you want your blog’s title to be a single word? Or two or three words? Is this a personal blog or will it be used for business purposes (in which case, it should be easily associated with the business’ title)?
Don’t think too hard about your blog’s name. This is just one small detail of your blog and will not significantly alter the success of your blog as a whole.
[/one_half_last]
STEP 2//
Register your domain and purchase hosting with Siteground.
![]()
As I mentioned above, to make a WordPress blog you’ll need to provide hosting for your WordPress site. You can do this easily and affordably with Siteground.
Head over to Siteground and hit the “Sign-Up” button! From here you’ll want to select your hosting plan. If you just need hosting for your WordPress blog, select the “Start-Up” plan.
The next page will allow you to enter your desired domain name. After you’ve entered the domain name you’d like to use, hit the “Proceed” button to see if that particular domain name is available. If it’s not, Siteground will offer additional suggestions. You can also try experimenting with different dot names such as yourdomainhere.co or yourdomainhere.net.
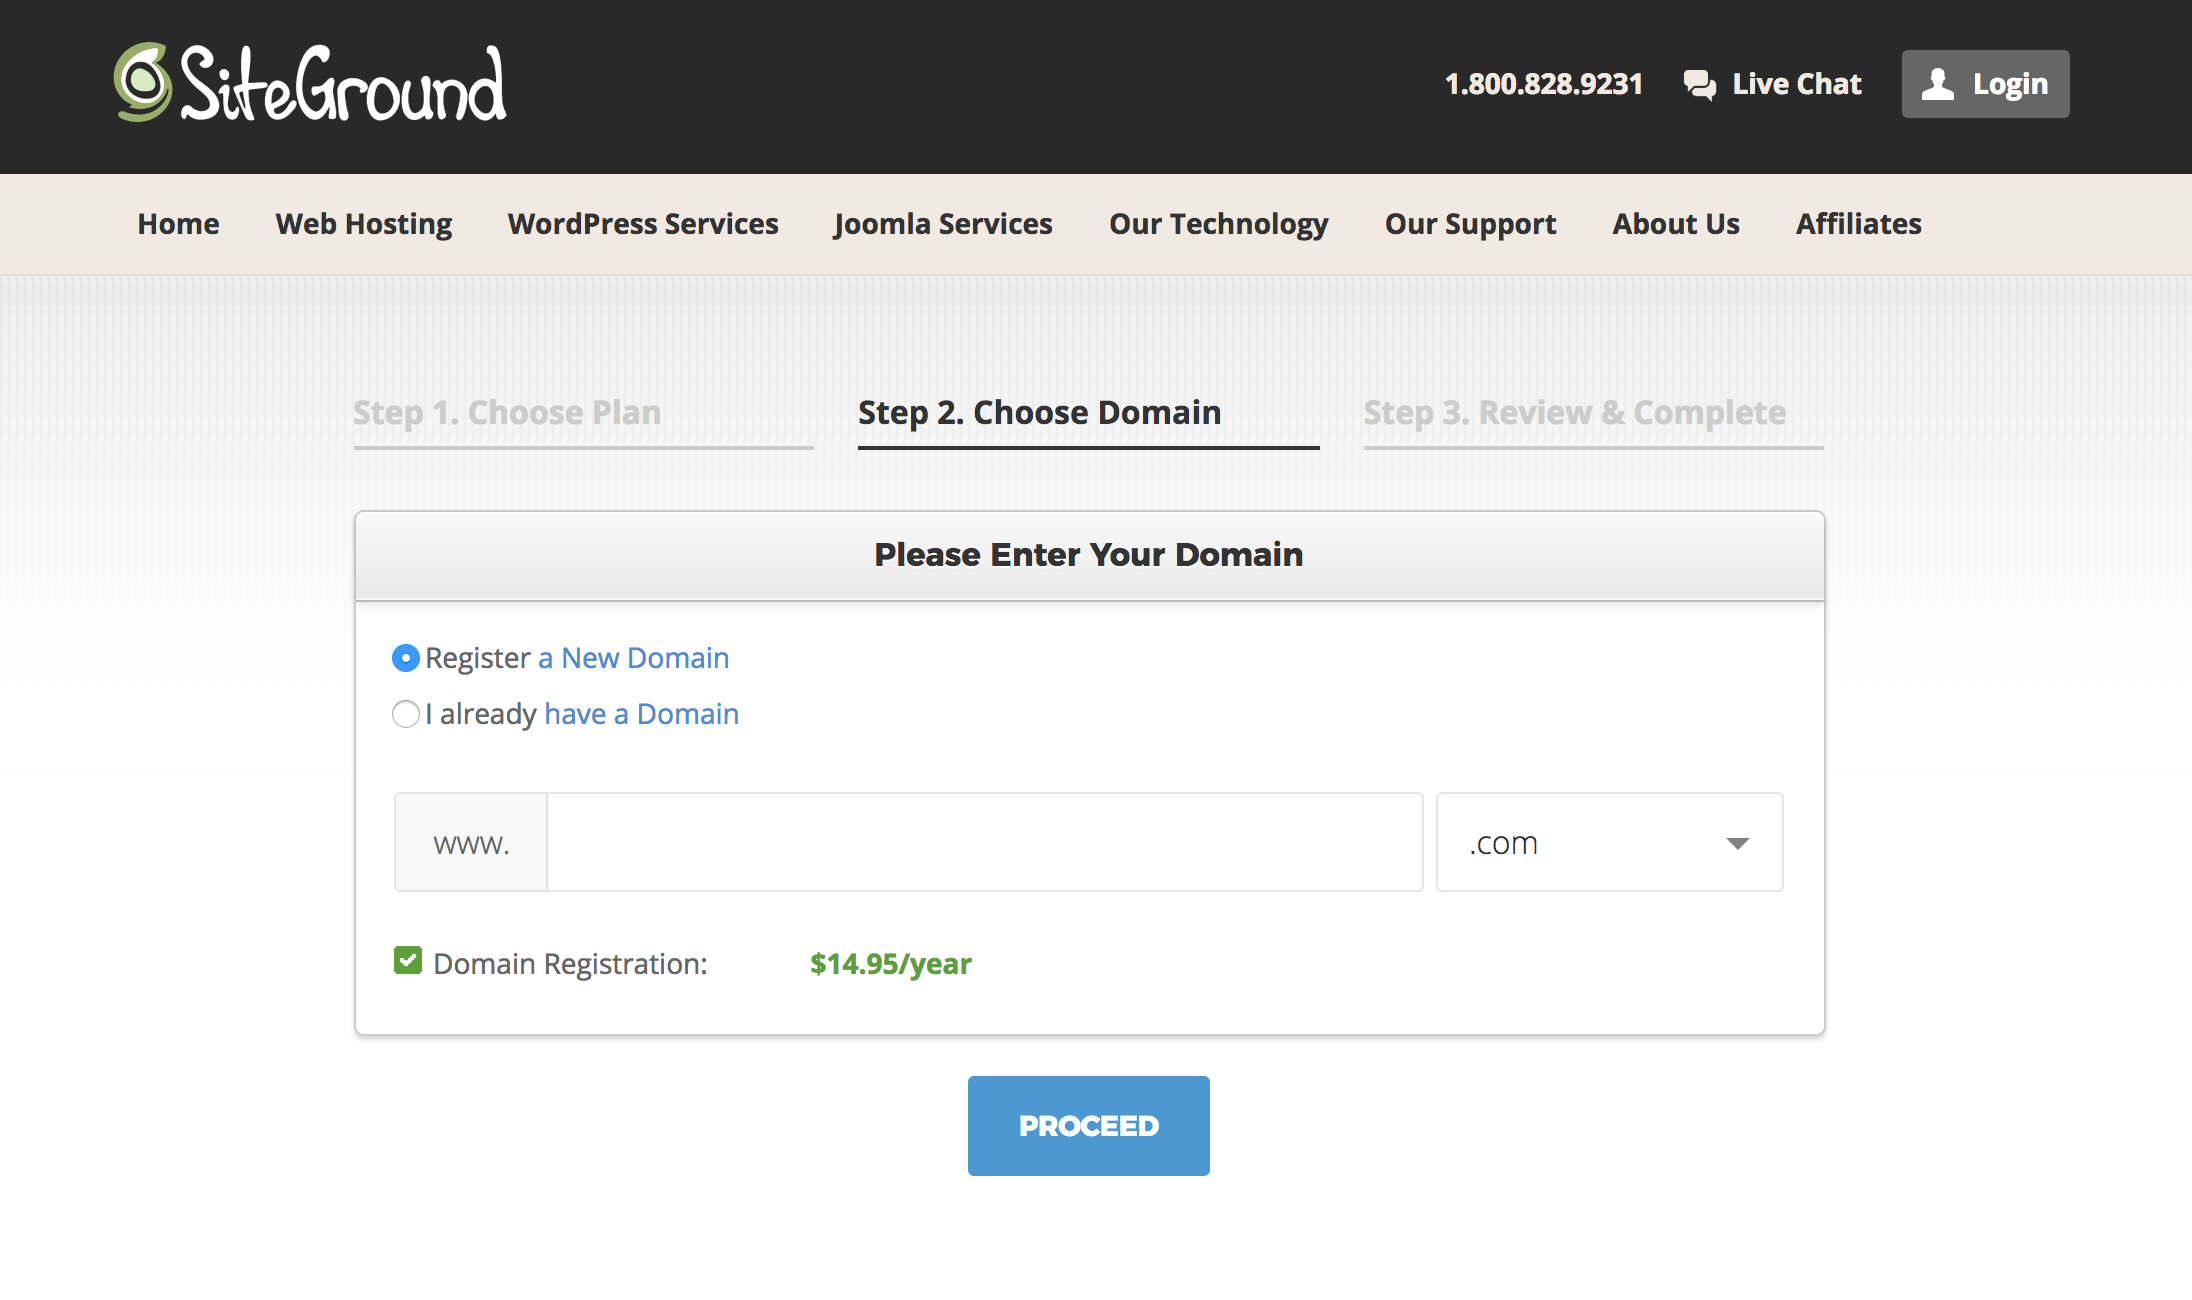
After you’ve selected an available domain name, complete the hosting & domain registration form. You will have the option to pay for 12, 24 or 36 months of hosting. If you want to just start with 12, no worries! Siteground will notify you when it’s time to renew your hosting plan. You can purchase domain privacy for an additional $12/year. This will keep your name and personal information private to anyone looking into your domain name. You can also add a SiteGround Site Scanner. I don’t think this is necessary, but it is available if you’d like it.
STEP 3//
Login to your new Control Panel and install WordPress on your domain.
![]()
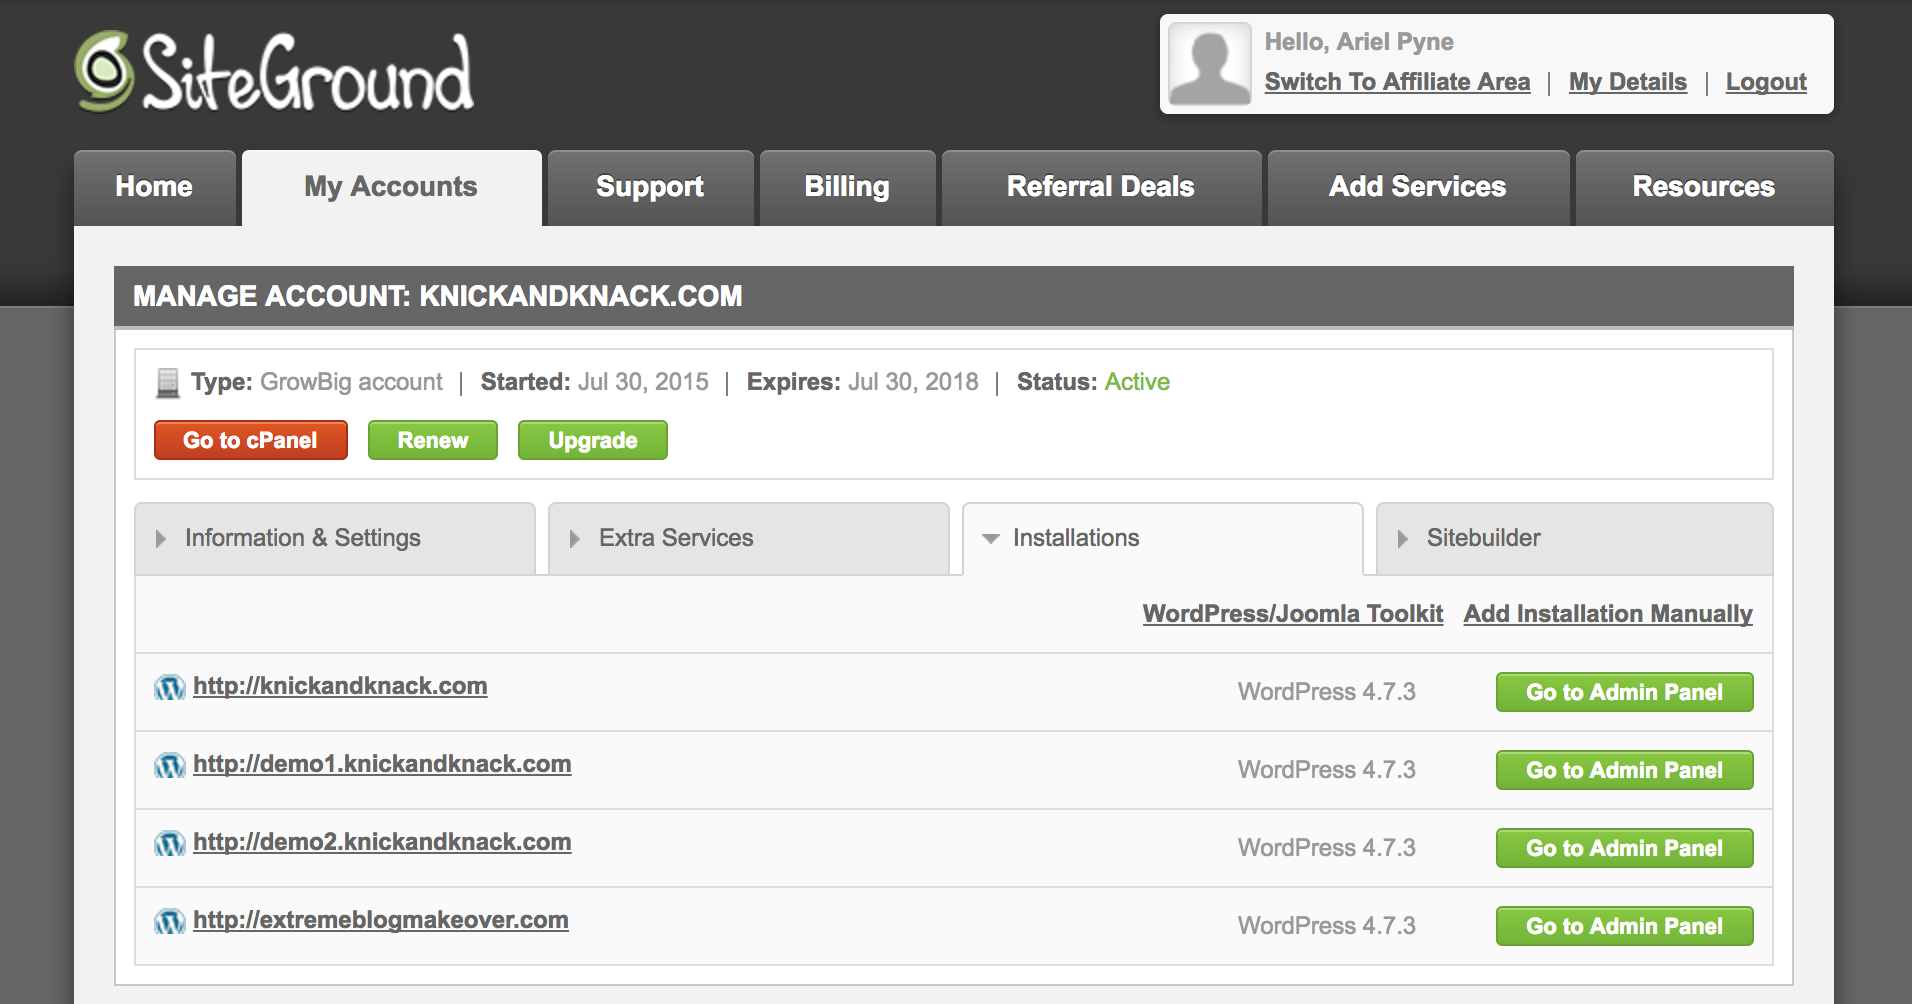
Once you’re logged in to your new Siteground account (you should be automatically logged in after completing the registration process) you’ll want to access the Control Panel. You can do this by going to the “My Accounts” tab and clicking on the red “Go to cPanel” button.
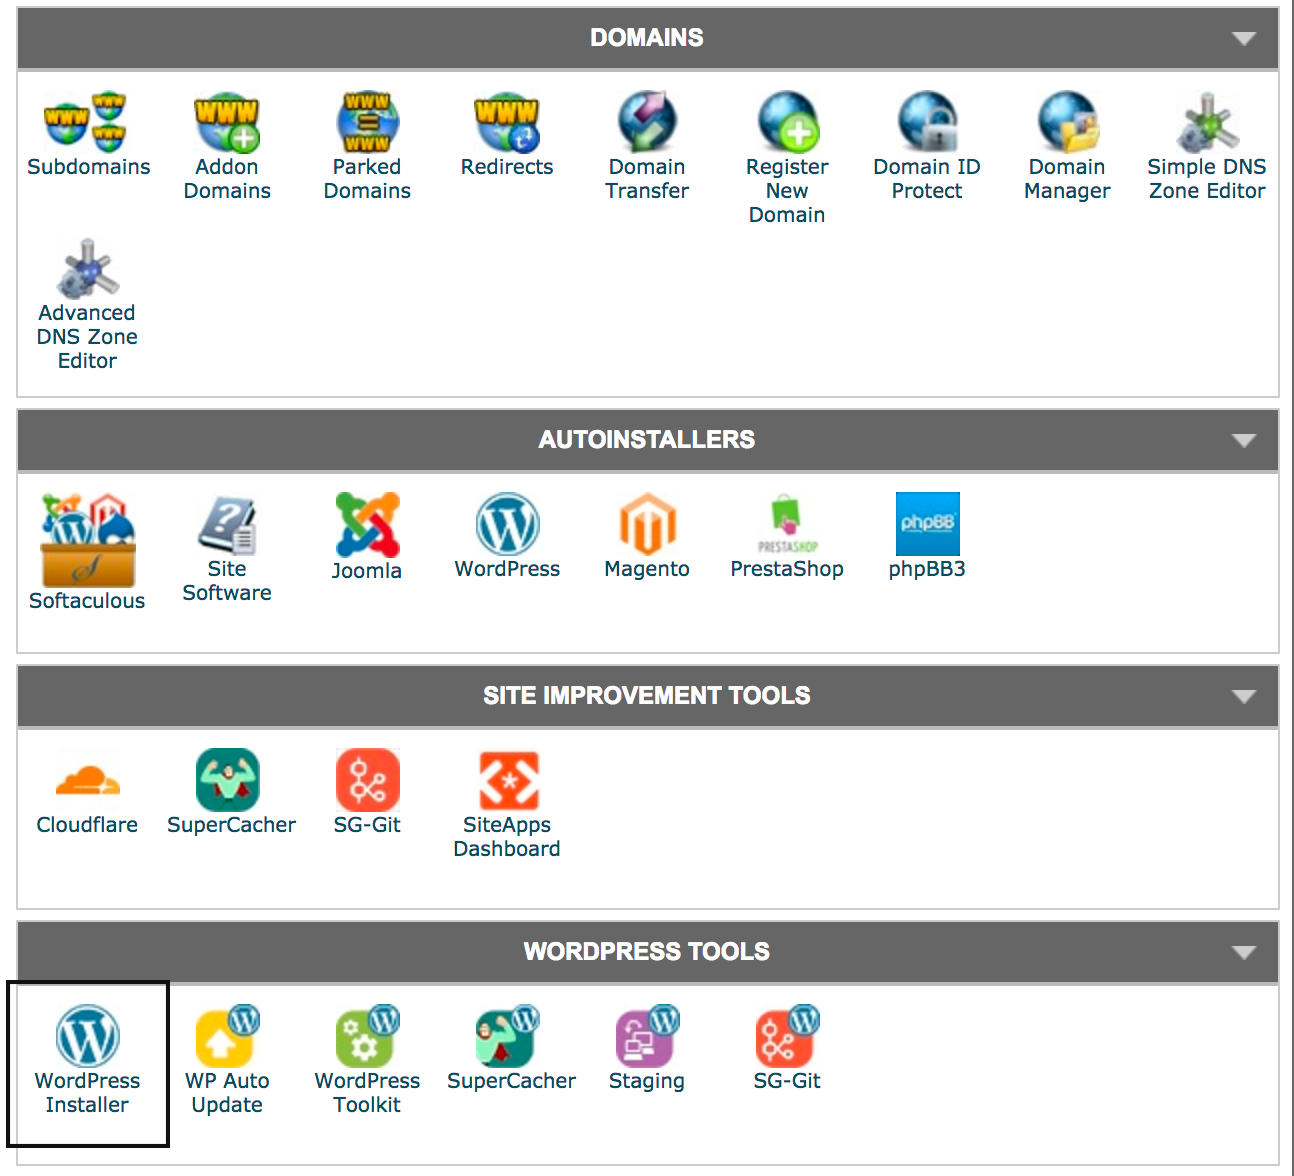
Once in your cPanel, scroll down to the section that’s titled “WordPress Tools” and click on the first icon titled, “WordPress Installer”.
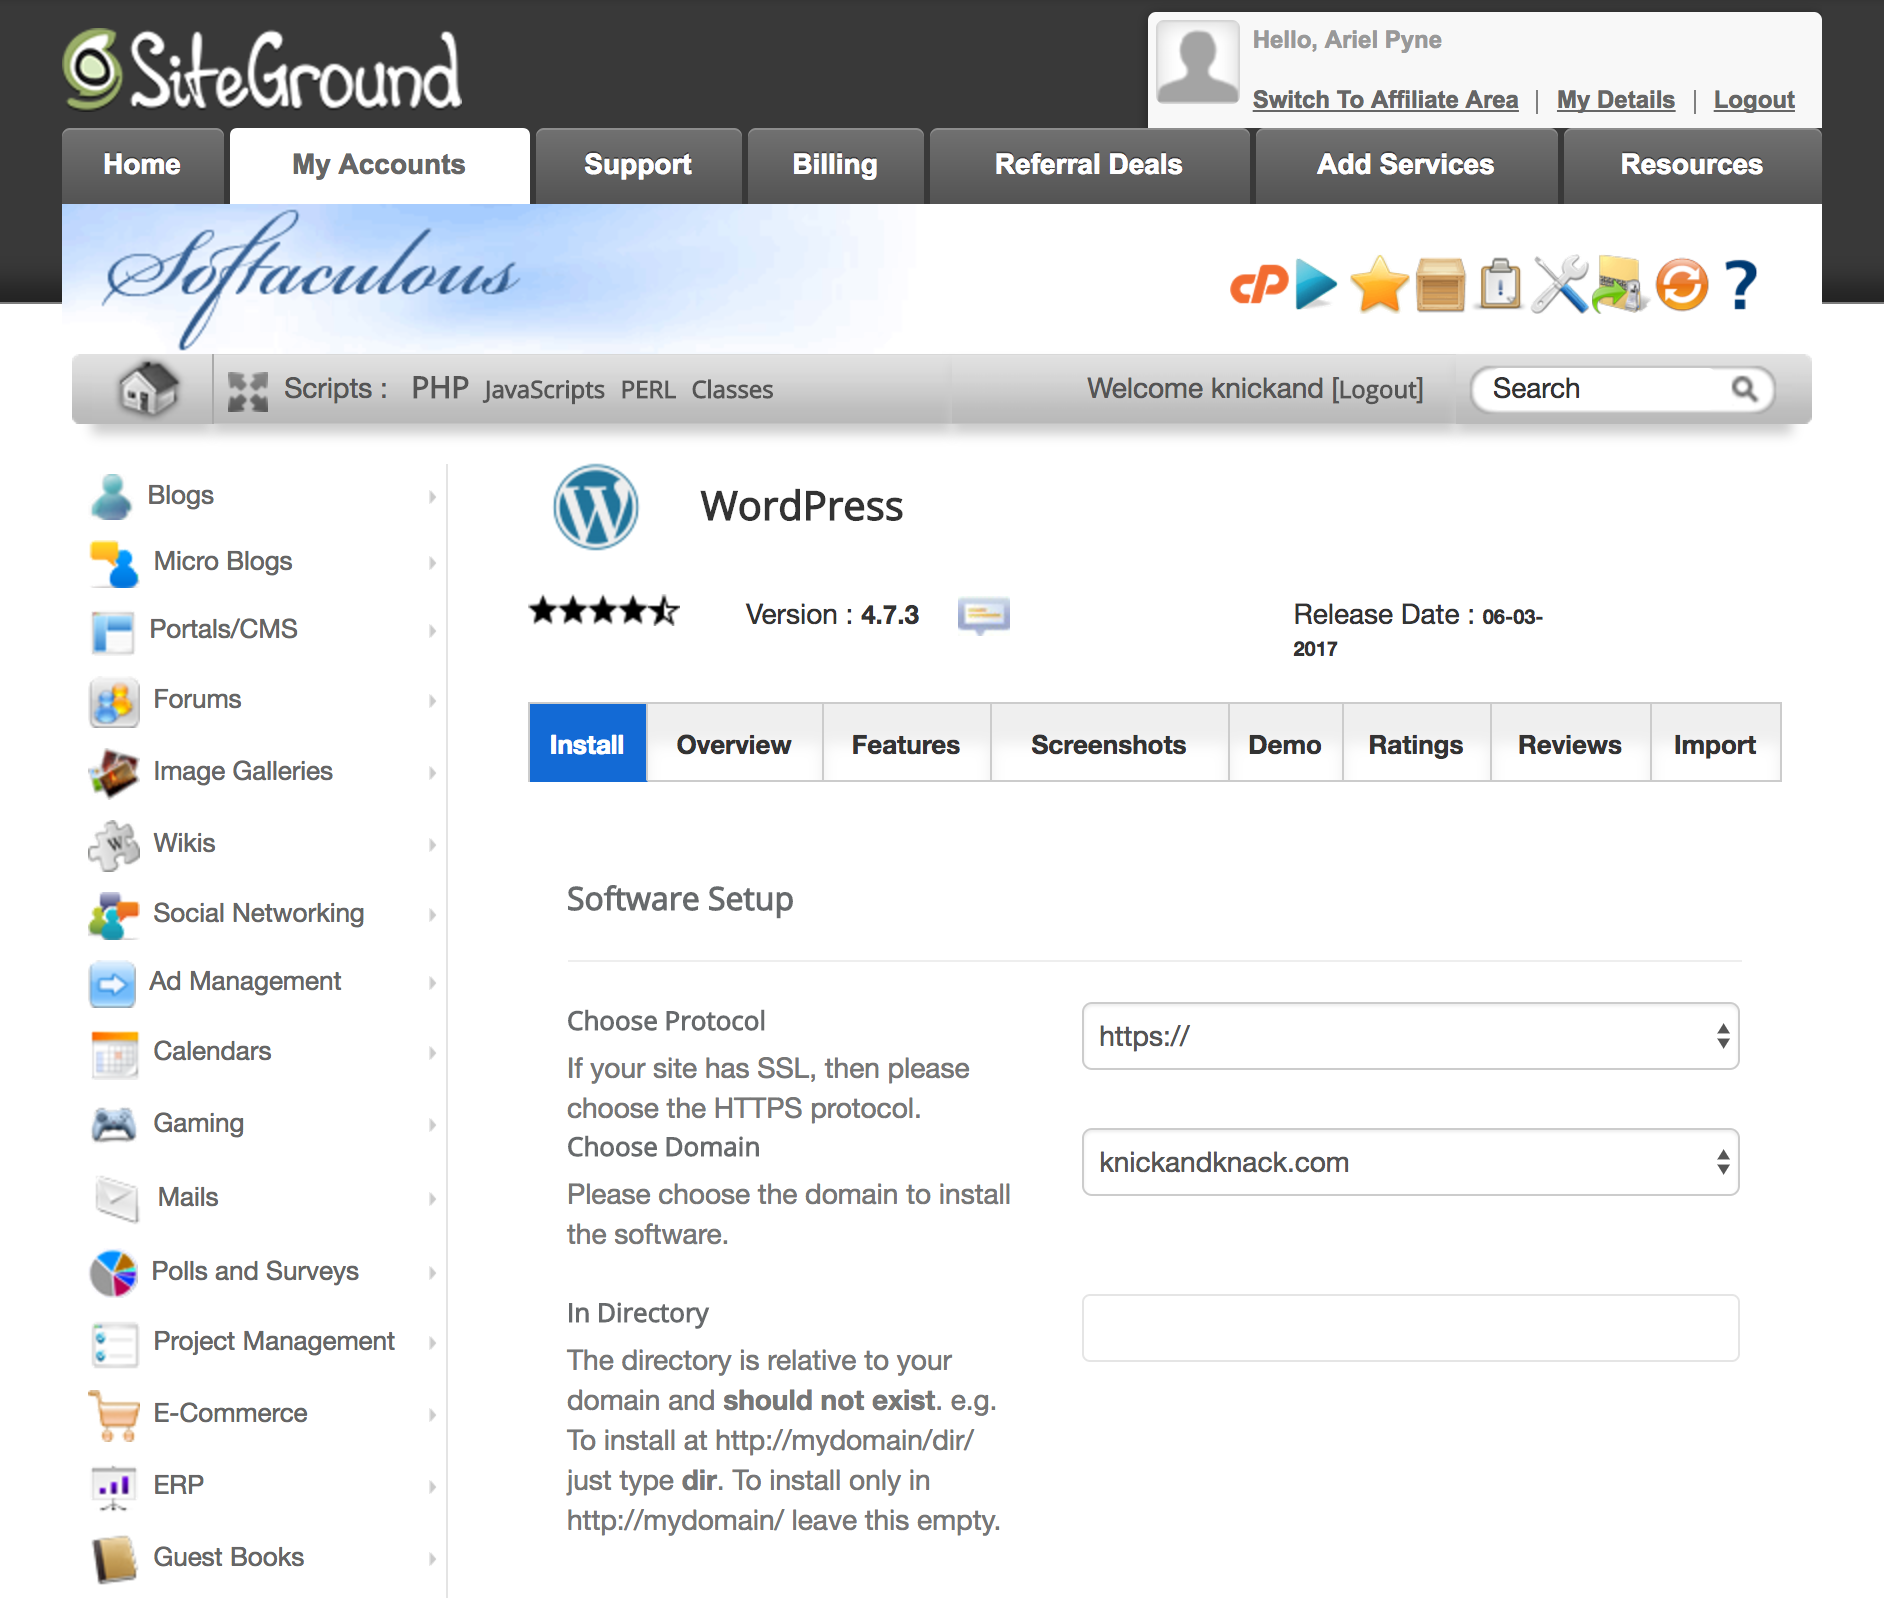
This will take you to a page that gives you a little more info on WordPress. You’ll want to click on the blue “Install” button just under the WordPress page title. From here, you’ll want to make sure the https:// option is selected (you’ll need this if you want to sell anything on your blog in the future). Next, select your domain from the drop down section. It may have your domain already selected by default.
In the “Site Settings” area you can title your site (you’ll probably just want this to be the name of your blog) and add a tagline. These will show up in the top tab when someone is viewing the homepage of your blog.
The “Admin Account” area is where you’ll set up your WordPress blog login details. This is where you can select the username and password you’d like to use every time you login to the backend of your WordPress blog.
Once all the above sections are filled out, go ahead and hit the “Install” button at the bottom of the page.
STEP 4//
Login to your WordPress backend.
![]()
After WordPress has been installed, visit www.yourdomainhere.com/wp-admin. Go ahead and bookmark this page, as this is how you’ll log into your blog from here on out! If you can’t access this page immediately, wait 10-15 and try again. Sometimes, it takes a few minutes for WordPress to finish installing on your domain.
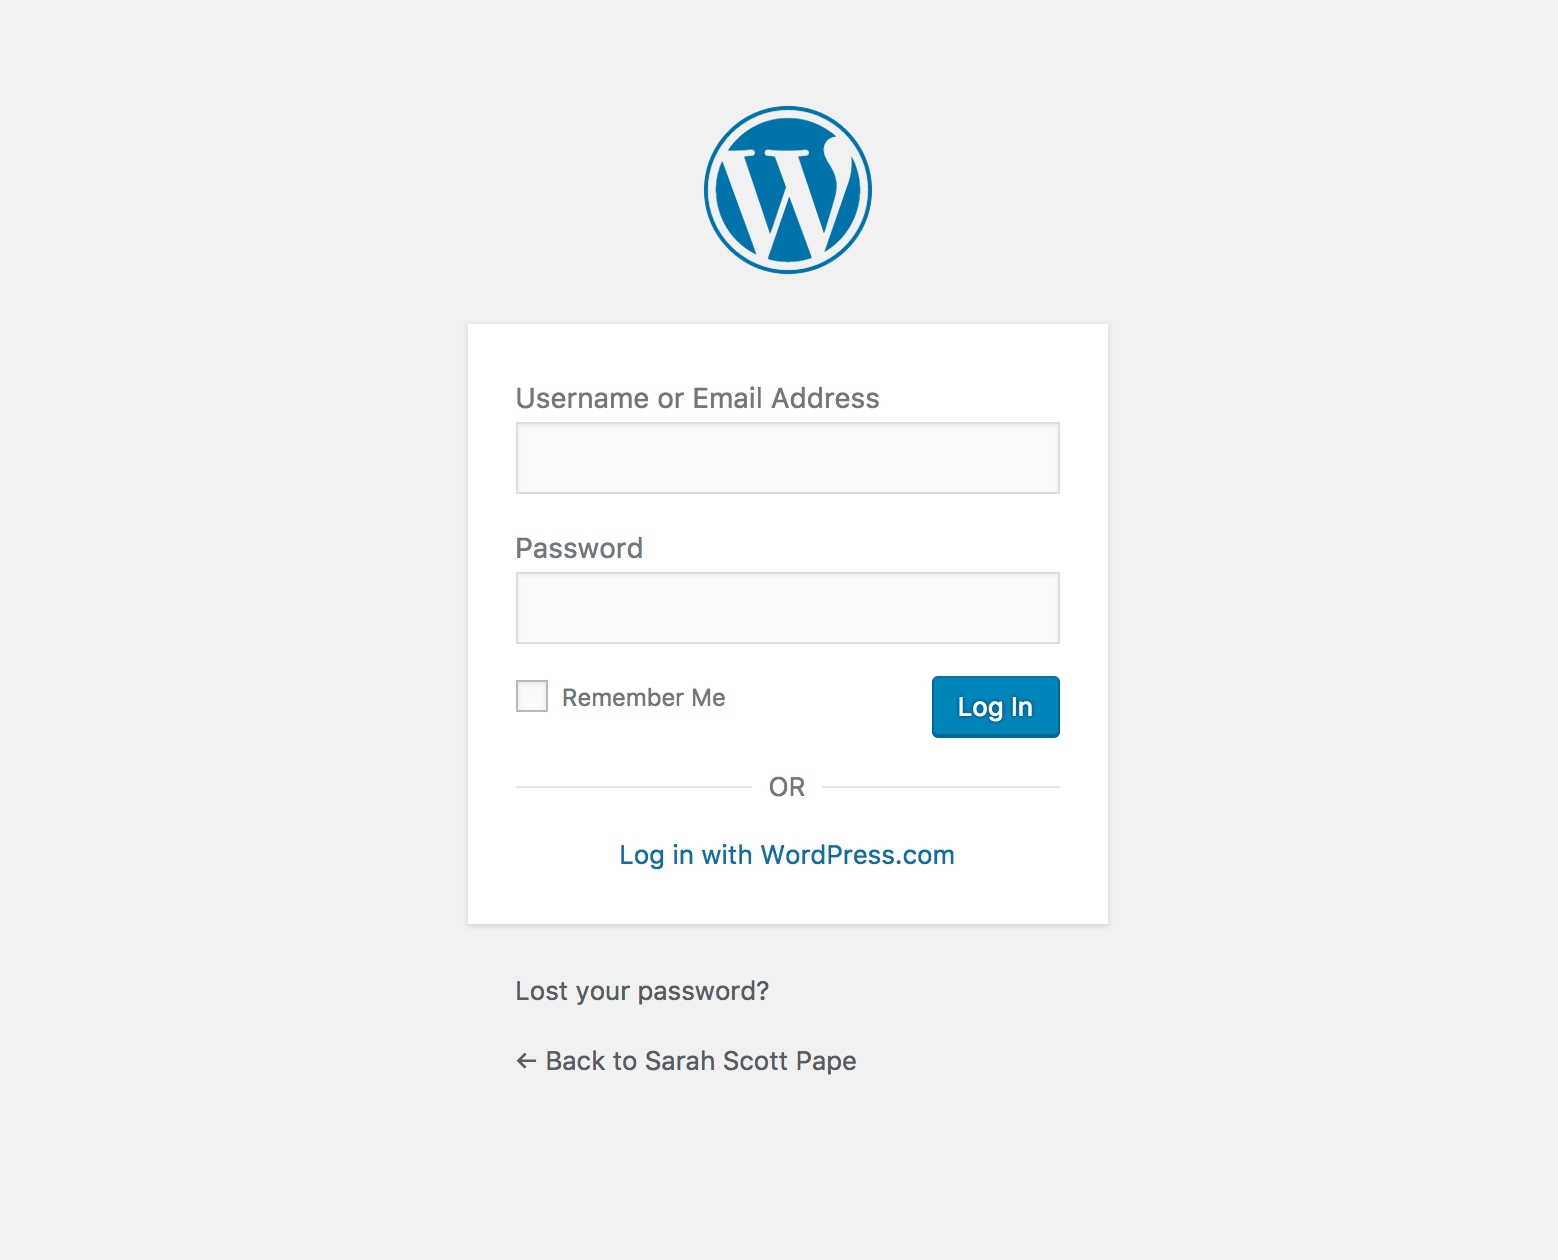
Once you can successfully access your login screen, enter the username and password that you created in the “Admin Account” section in Step 3. After logging in, you’ll be taken to your WordPress backend.
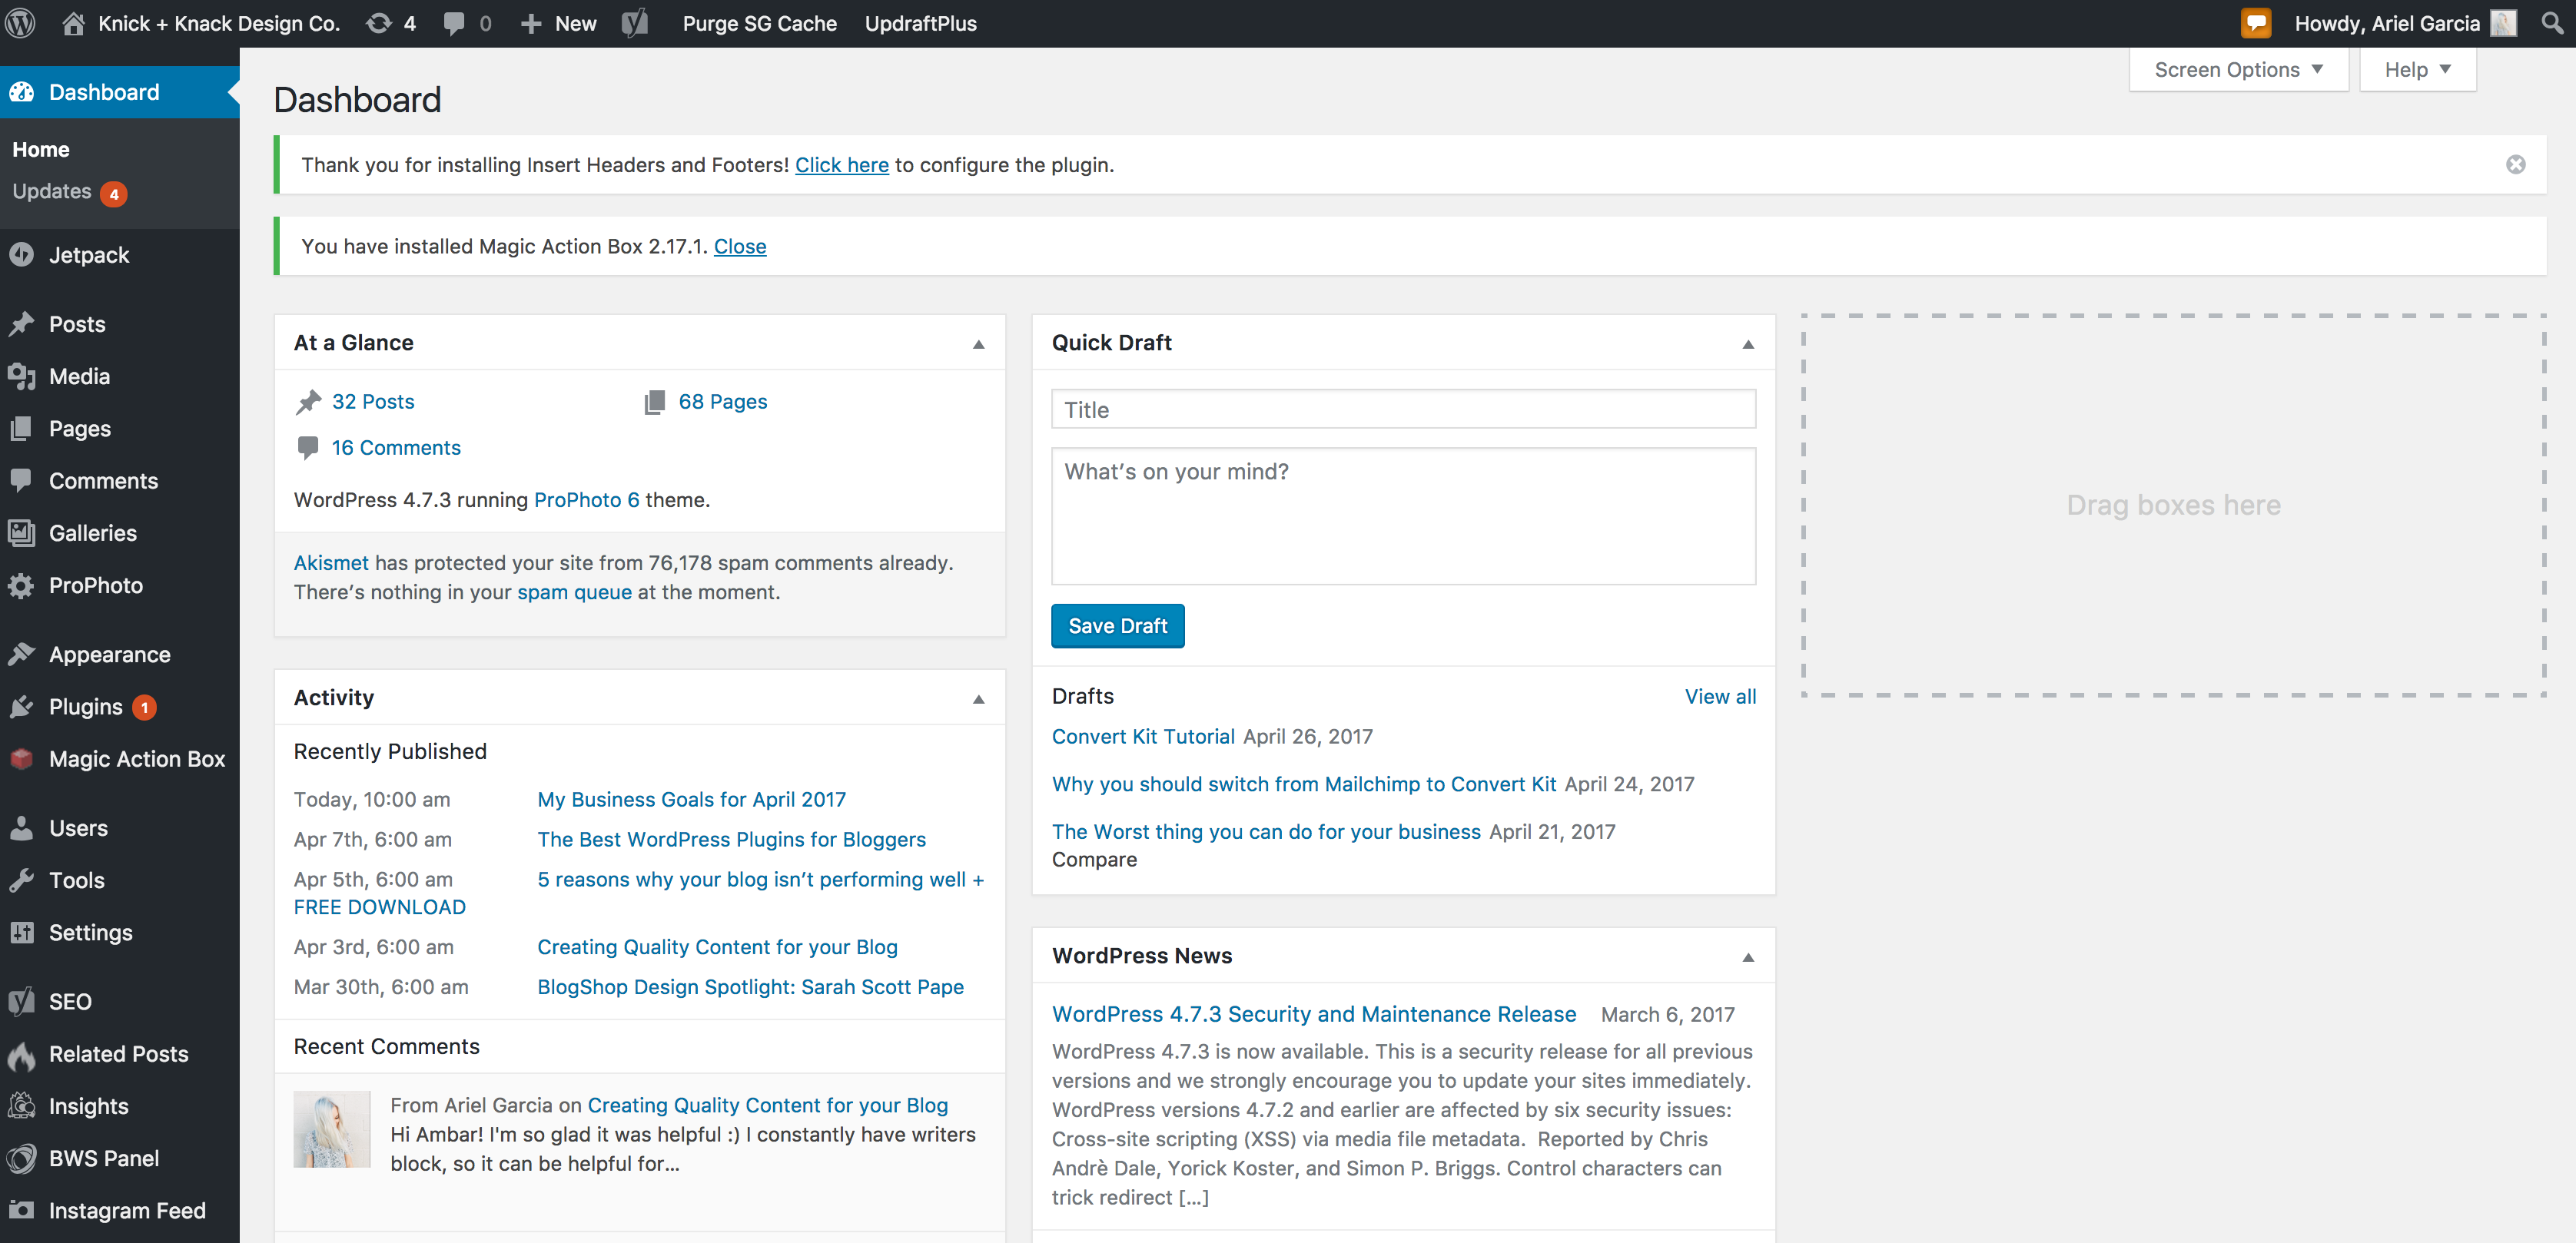
STEP 5//
Install a WordPress theme.
![]()
The visual element of WordPress is determined by the theme you choose to use. You can browse various themes by going to Appearance > Themes from the lefthand menu in your backend.
>>> Read more about my favorite WordPress theme here <<<
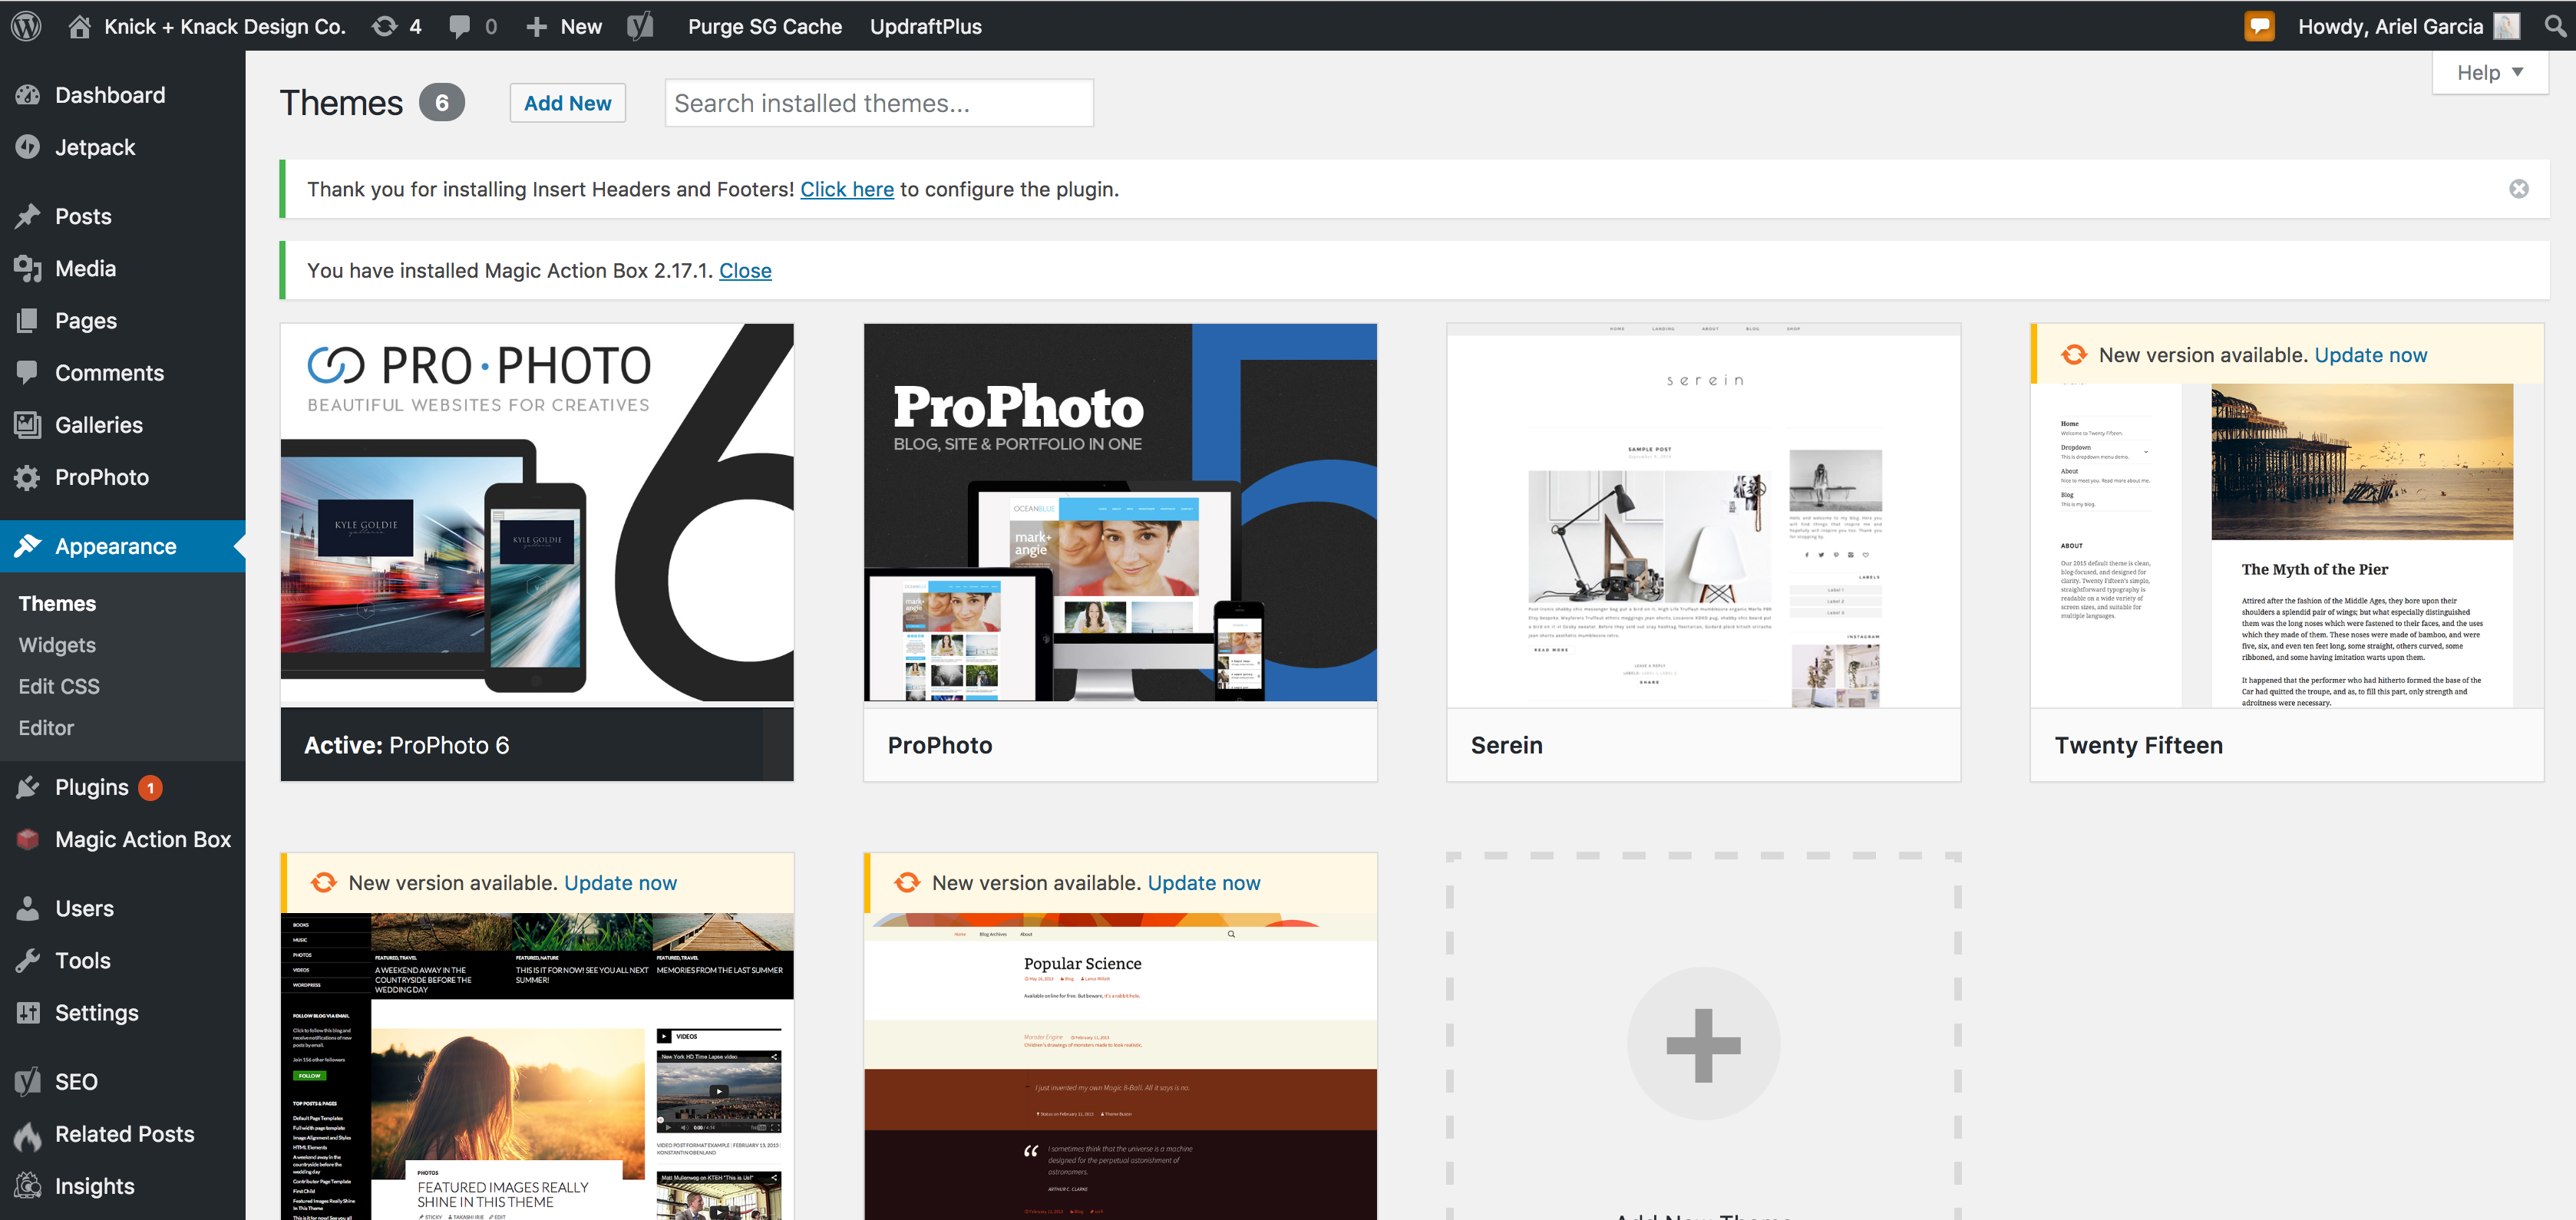
You can browse themes by clicking the “Add New” button at the top of this page.
Be sure to also browse through my ProPhoto templates over in the Shop!
Once you’ve landed on a theme, hit the blue “Install” button for that specific theme. This will add it to your themes library and from here, you can click the “Activate” button located on the theme preview thumbnail.
STEP 6//
Start writing!
![]()
To write your first post, click on “Posts” near the top of the lefthand WordPress backend menu. From here, you can click on the “Add New” button at the top of the page to start a new post!
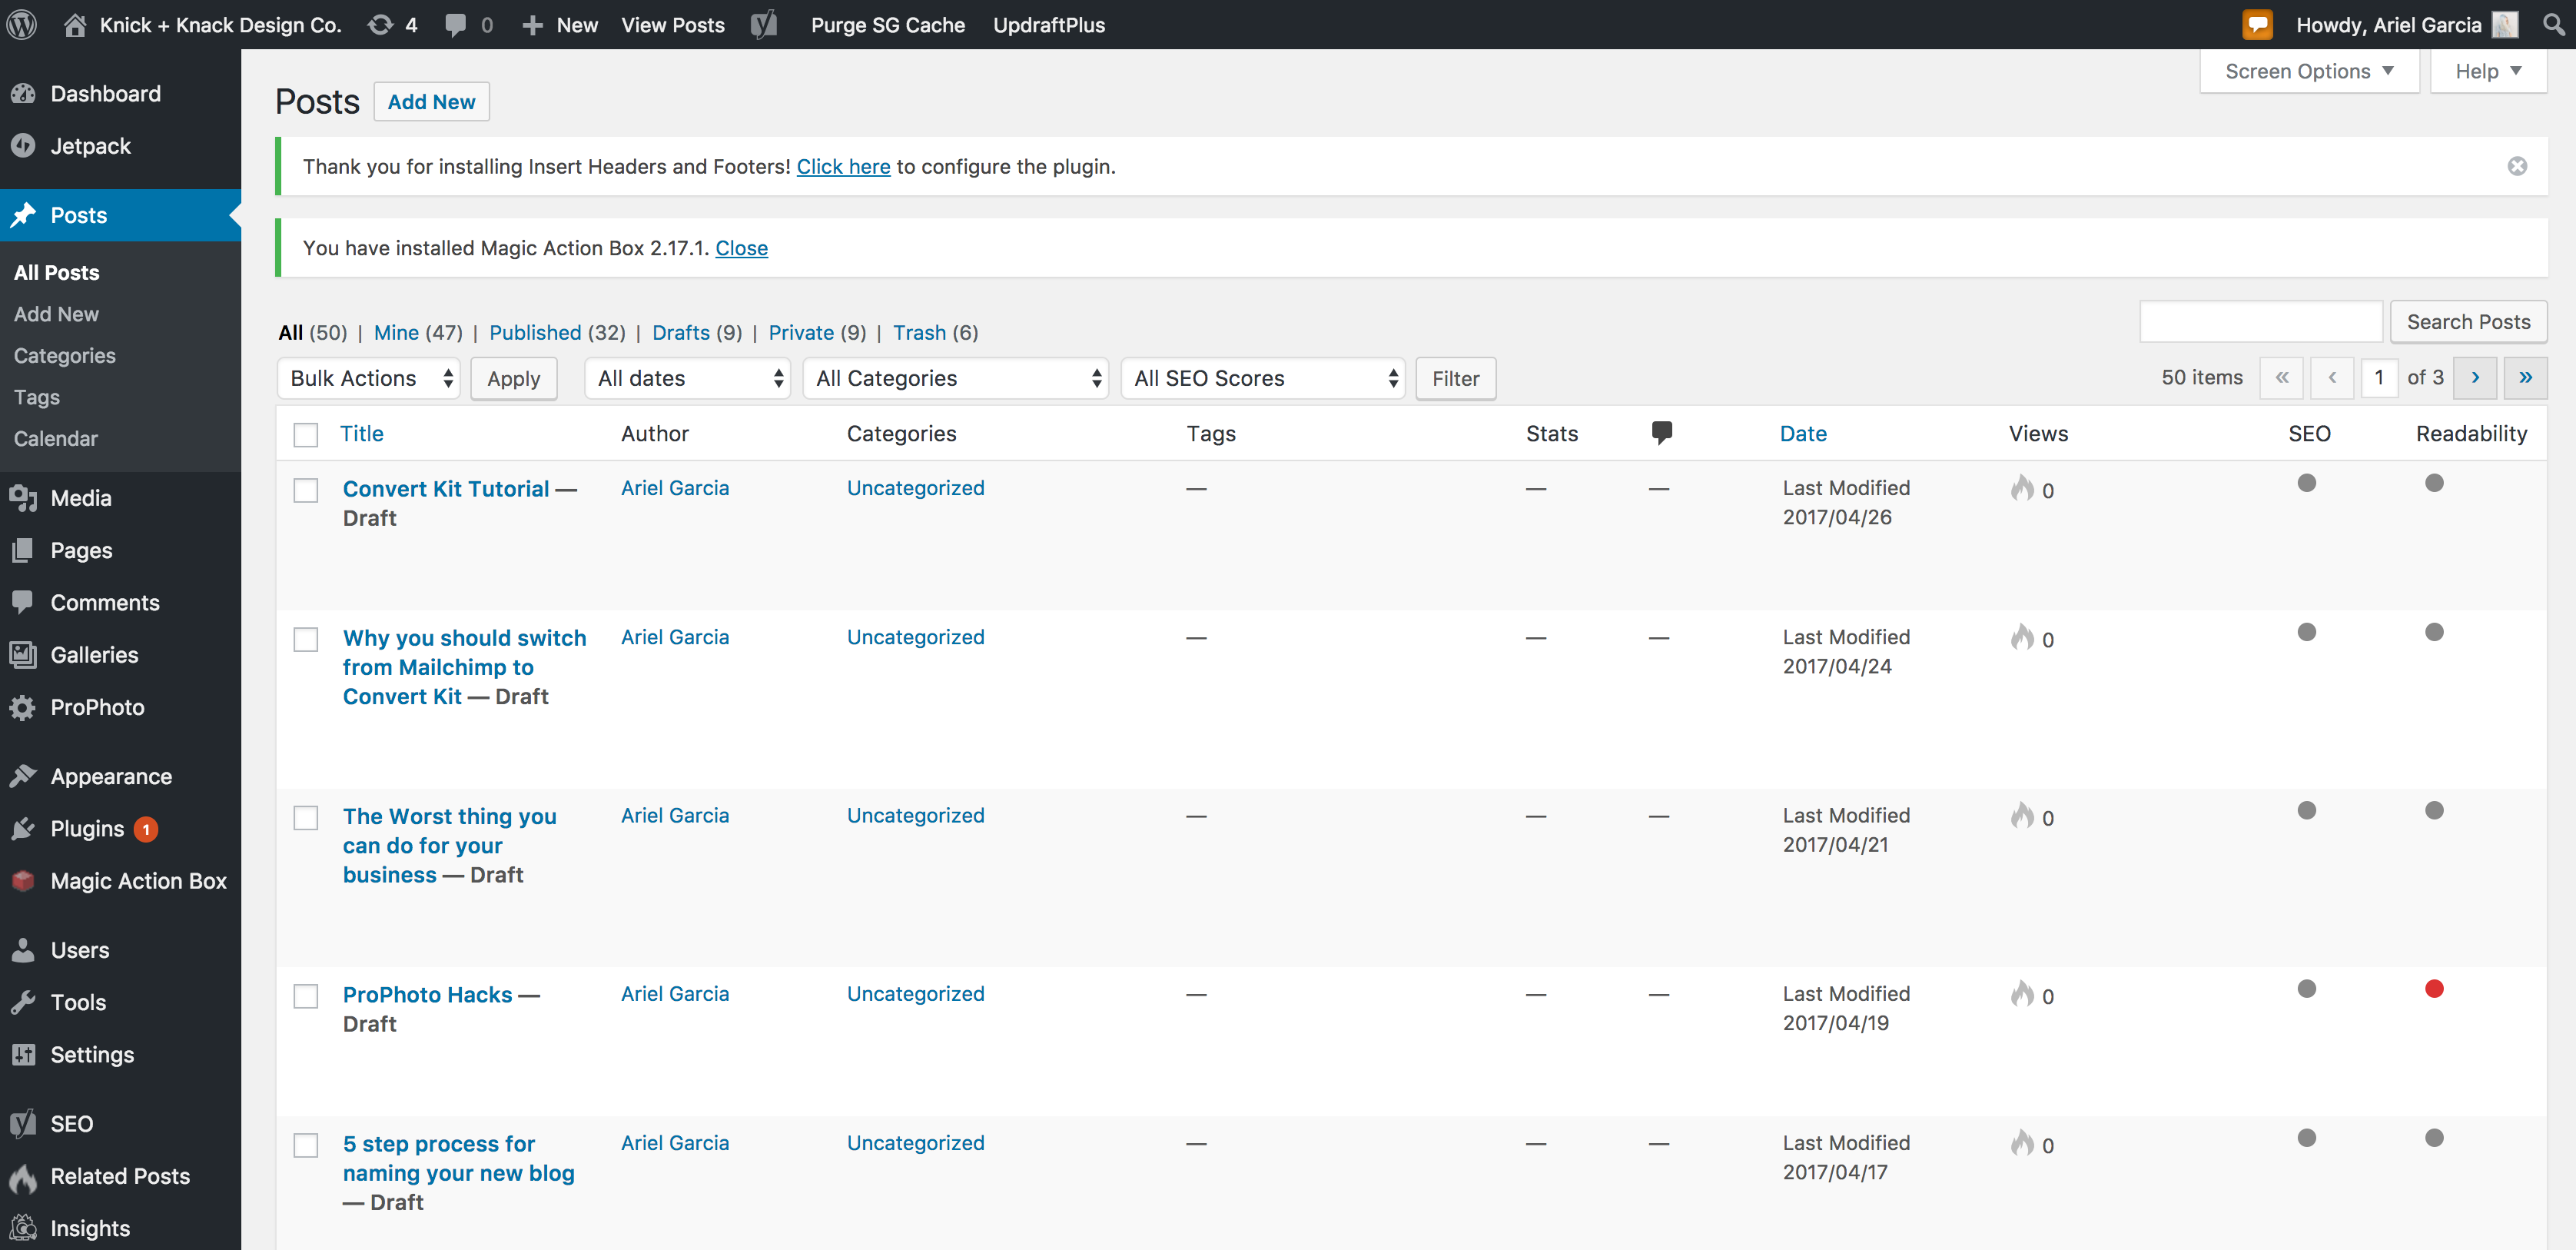
Give your post a title and then begin writing your post in the main text box. You can add photos by clicking on the “Add Media” button just above the text box.
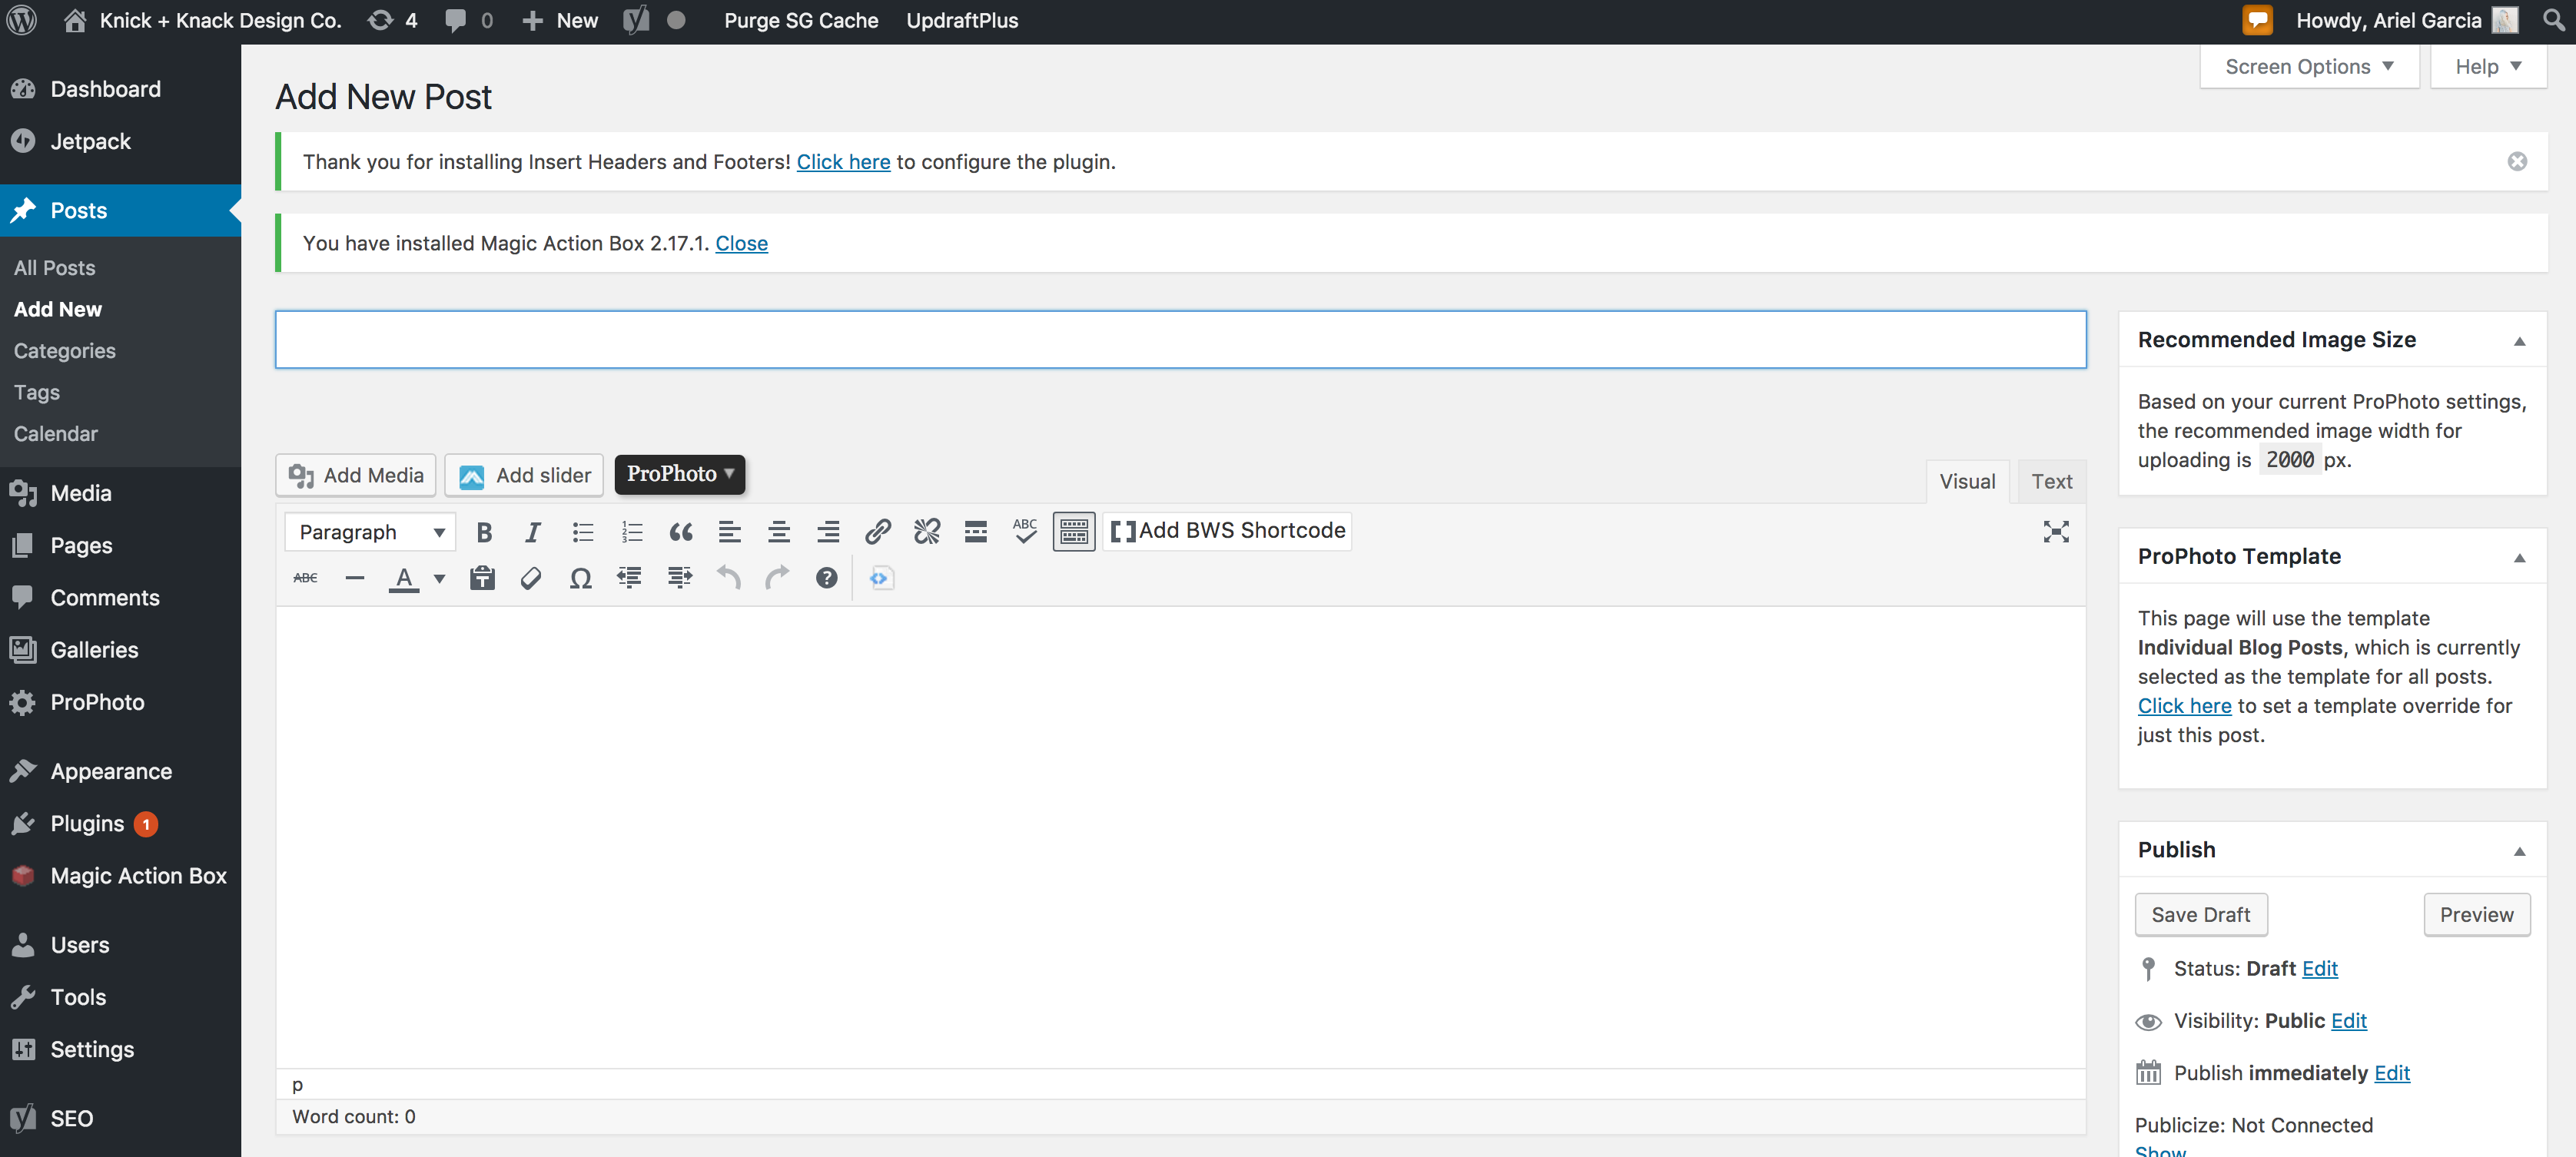
You can preview your post by hitting the “Preview” button on the right side of the screen. When your post is finished, hit the blue “Publish” button to publish your post for the world to see!
![]()
And there you have it! You now know how to make a WordPress blog with Siteground.
Happy blogging!
xx,
Ariel
You may also like…